BigQuery Secure Views Tutorial
As part of creating secure views with Bornio, you:
- Connect to a sample BigQuery database
- Ingest schema and metadata from the source
- Review how Bornio automatically protects data in the Data Preview mode
- Customize your privacy policy
- Deploy the secure views into BigQuery
See using Bornio to create secure views for generalized instructions.
Prerequisites
Before starting, you must have successfully:
- Installed Bornio in your GCP.
- Obtained permissions and login credentials to the GCP project that contains the public cms_medicare BigQuery dataset.
- Obtained permissions and login credentials to the target GCP project for your protected dataset.
Creating a Data Source
Creating a data source establishes all the necessary connection information for Bornio to access the schema and metadata information that is needed to protect data and customize privacy policies.
- Open and login to Bornio Studio.
- Click + Data Source.
- Click Google BigQuery.
- Enter the Account key credentials.
- Enter the Project name.
- Enter cms_medicare for the Dataset name.
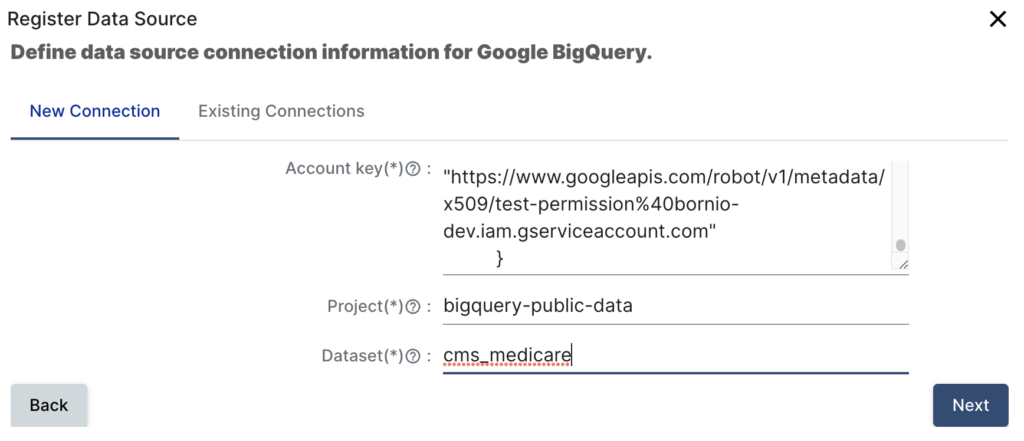
- Click Next.
The data source is registered and you are taken to Preview mode: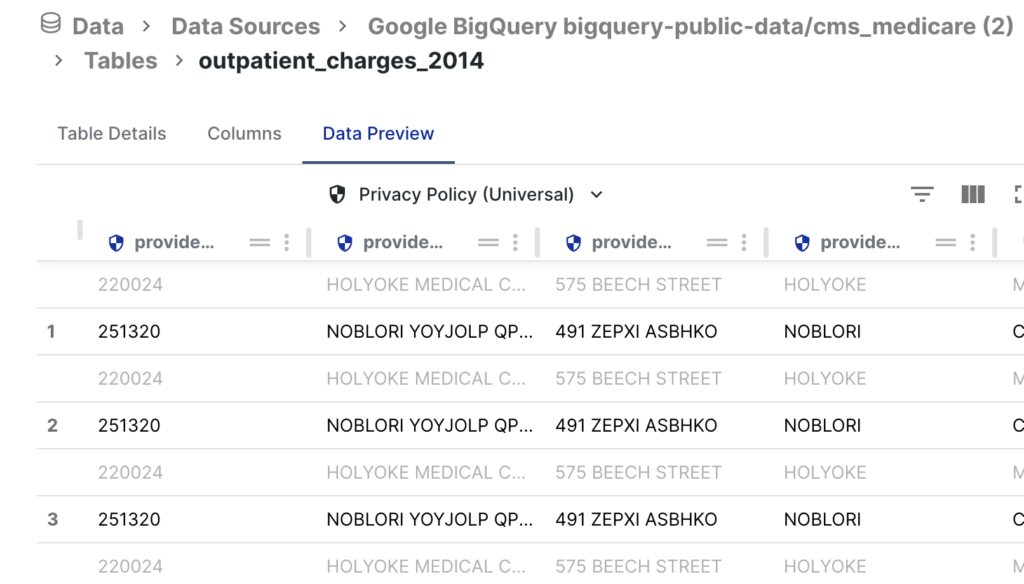
Note: Preview mode shows two rows for each original row of data. The first row is shown in light gray and represents the original data. The second row, which in numbered, is in a darker gray to indicate how the protected data would appear when deployed to a target location.
See creating a data source for general instructions on Bornio data sources.
Customize your Privacy Policy
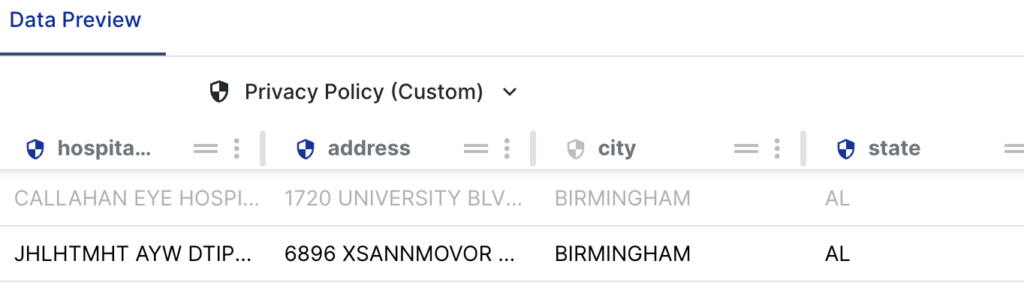
Let’s customize our privacy policy so that the original city and zip data is retained.
- Using the left nav in Bornio, locate and expand bigquery-public-data/cms_medicare.
- Click hospital_general_info, to open the table in preview mode. For example:
- Click the shield icon next to city.
- Refresh your browser.
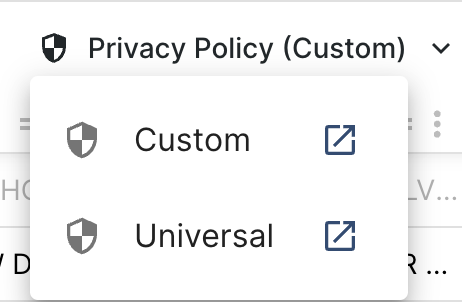
Confirm that a custom privacy policy was created for you. You should see:
- Optionally, select Privacy Policy to review the list of policies available for this table.
- In the Zip column, select the three vertical dots.
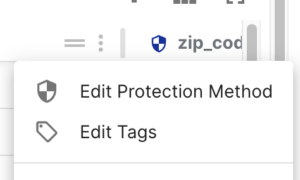
- Select Edit Protection Method.
- Select the down arrow.
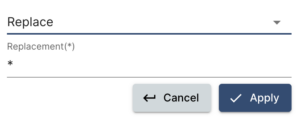
- Select Retain.

- Click Apply.
- Confirm that the policy is retaining City and Zip information.
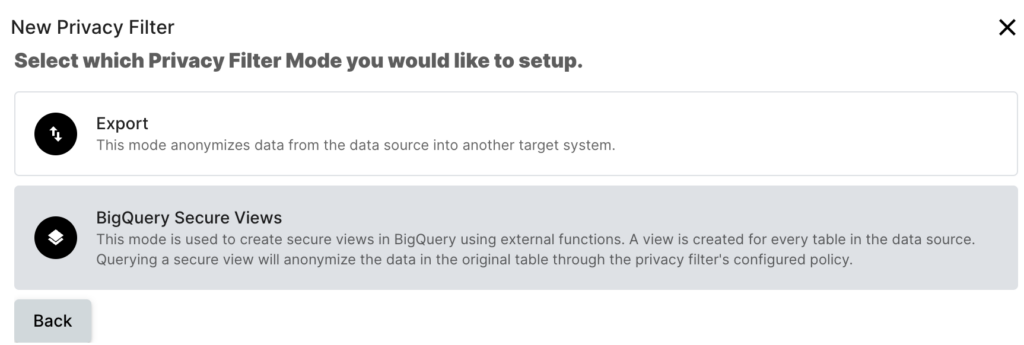
Define and Deploy your Bornio Privacy Filter
Bornio privacy filters keep track of each unique combination of data source, protection policy, and target location.
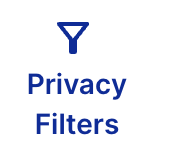
- In the left nav, click Privacy Filters.
- Click + Privacy Filter.
- Select the data source which you want to control the privacy policies for your target data.
- Select BigQuery Secure Views.
- Select Custom for Default Bornio Policy.
- Enter the Target Project. For example, select bornio-demo.
- Enter the Target Dataset. Use a name that indicates that the data is secure and is easy for you to find. For example, secure_med.
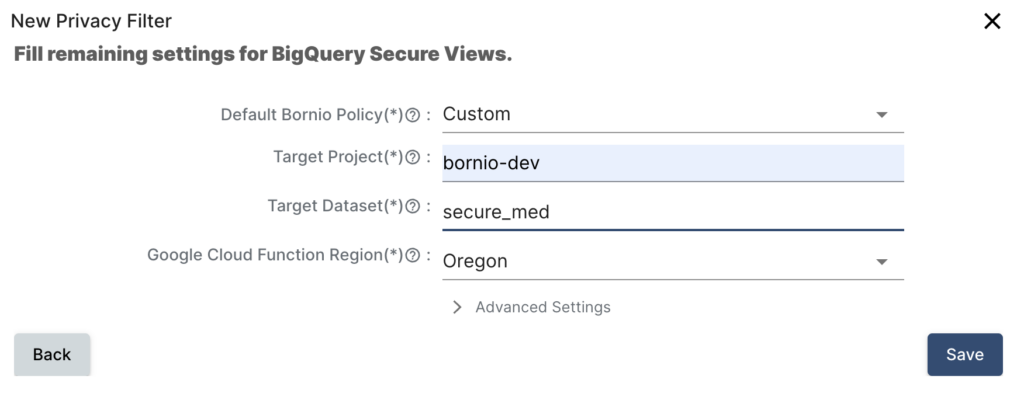
- Click Save to deploy your secure views.
Give Bornio a few minutes to create all the secure views in your GCP project.
Verifying Creation of your Secure Views
You can use the Google Console to verify that the secure_med dataset was created for you and that the data is protected.
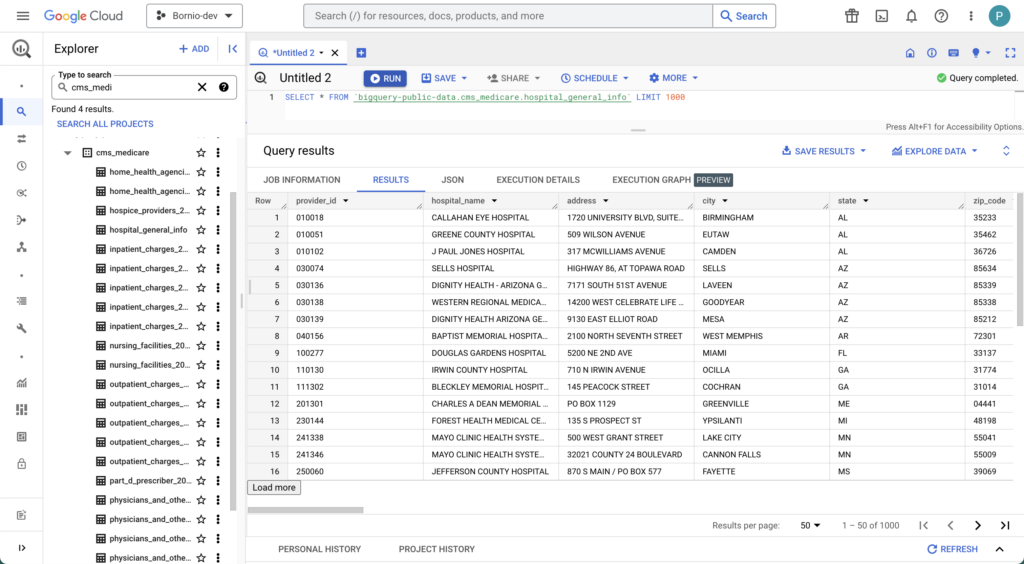
- In the Cloud Console, open BigQuery.
- Expand the bornio-demo project.
- Expand secure_med.
- Open hospital_general_info.
- Click Query.
- Click split tab.
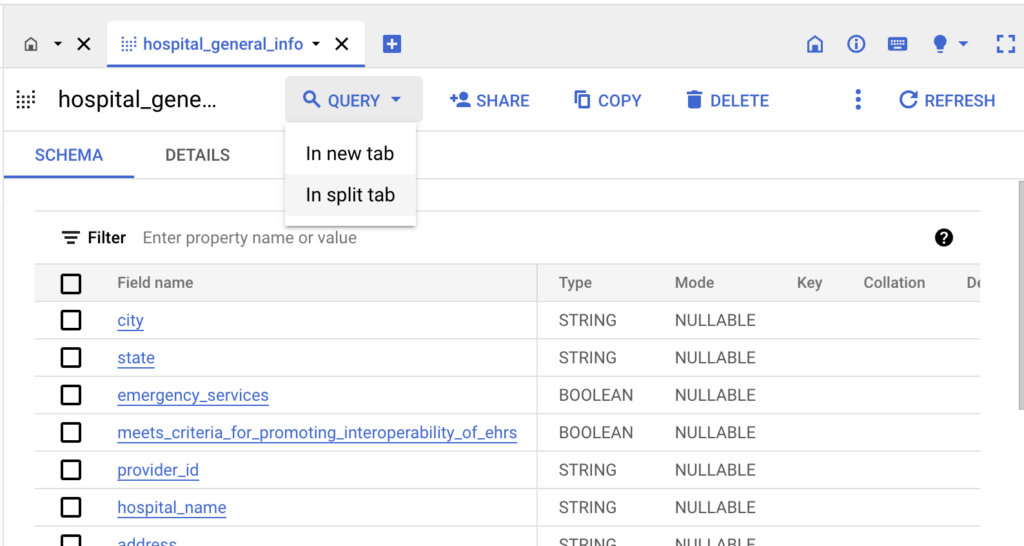
- Type an astrick (*) in the query syntax.
- Click RUN.
- Review the results to validate your data protection.